Thursday, April 23, 2009

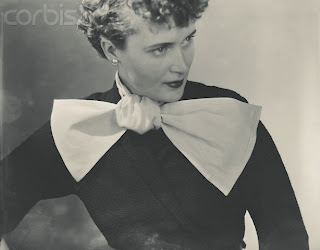
Monarch 1935 Blouse


Ladies’ Blouse 716
Size 34

Measurements of finished garment. -All around at underarm, 34 inches. From shoulder to bottom of garment, 19 inches. Length of sleeve at underarm seam, 5 inches.

Tension of Stitch. -8 sts. =1 inch.

Materials used:
Monarch Fairy
3 Balls Absinthe
1 Ball White
1 Pair No.11 Needles
1 Pair No. 7 Needles

BACK-Starting at bottom, WITH DOUBLE WOOL and No. 11 needles, cast on 110 sts. Work in ribbing (K1 P1) for 3 1/2 inches. CHANGE TO NO. 7 NEEDLES and WITH SINGLE WOOL, knit 1 ROW increasing to 117 sts. Purl back.
NEXT START PATTERN-
1st ROW-K1, *WO, S1, K1, PSSO, KI, K2TOG, WO, K6* repeat from * to within 6 sts, WO. S1, K1, PSSO, K1, K2TOG, WO, K1.
2nd and EVERY ALTERNATE ROW-Purl.
3rd ROW-K2, *WO, S1, K2TOG, PSSO, WO. K8, repeat from * to within 5 sts, WO, S1, K2TOG, PSSO, WO, K2.
5th ROW-Same as 1st ROW.
7th ROW- K2, *WO, S1, K2TOG, PSSO, WO. K1, slip 3 sts on spare needle (this forms cable), K1, repeat from * to within 5 sts, WO, S1, K2TOG, PSSO, WO, K2.
Repeat these 8 ROWs until work measures 13 inches from beginning (9 cables). Cast off 16 sts at beginning of each of next 2 ROWs, then decrease 1 st at each end of needle every 2nd ROW, 6 times, FOR UNDERARM (being careful to keep pattern even). Continue evenly until armhole measures 6 inches from first decreasing. Cast off loosely.

FRONT- Starting at bottom, WITH DOUBLE WOOL- and No.11 needles, cast on 110 sts. Work in ribbing (K1 P1) for 3 1/2 inches. CHANGE TO No.7 NEEDLES. Knit 1 ROW, increasing to 120 sts. Purl back. NEXT START PATTERN.
1st ROW-K2, *K6, WO, S1, K1, PSSO, K1, K2TOG, WO, repeat from * to within 8 sts, K8.
2nd AND EVERY ALTERNATE ROW-Purl.
3rd ROW-K1 *K8, WO, S1, K2TOG, PSSO, WO, repeat from * to within 9 sts, K9.
5th ROW-Same as 1st row.
7th ROW-K2 *cable 6 sts, K1, WO, S1, K2TOG, PSSO, WO, K1, repeat to within 8 sts, cable 6, K2.
Repeat last 8 rows until work measures 13 inches. Cast of 14 sts, at beginning of next 2 rows. Work in pattern, 41 sts, making an extra st. in each of the next 4 sts (40 sts).

Place remaining sts on a stitch holder, then keeping 7 sts in garter st, at neck end for band, continue, being careful to keep pattern even, decreasing at armhole end, 1 st every 2nd row, 4 times, and decreasing 1 st neck end, inside garter st band, every 4th row.

When armhole measures 6 inches from 1st decreasing, cast off all but 8 sts at neck end. Continue in garter stitch on these 8 sts for 16 rows. Cast off. Take other sts from holder and work other front and shoulder to correspond.

SLEEVES-Starting at cuff, with No 11 needles and DOUBLE WOOL, cast on 90 sts. Work in ribbing (K1 P1) for 1 inch. CHANGE TO No 7 NEEDLES and SINGLE WOOL and knit 1 row, decreasing to 81 sts. Purl back.
Next START PATTERN-
1st ROW-K2, *K6, WO, S1, K1, PSSO, K1, K2TOG, WO, repeat from * ending with K2.
2nd AND EVERY ALTERNATE ROW-Purl.
3rd ROW-K1 *K8, WO, S1, K2TOG, PSSO, WO, repeat from * ending K3.
5th ROW-Same as 1st row.
7th ROW-K1, *K1, cable 6 sts, K1, WO, S1, K2TOG, PSSO, WO, repeat from * ending K3.
repeat these 8 rows, twice (3 patterns), then work 1st and 2nd rows only,
Cast off 6 sts, at beginning of each of next 2 rows, then decrease 1 st at each end of needle, every 2nd row until 45 sts remain, being careful to keep pattern even. Cast off.

TIE- Using DOUBLE WHITE WOOL and No. 11 needles, cast on 2 sts. Work in ribbing (K1 P1) increasing 1 st at beginning of every 2nd row, until there are 16 sts on needle. Work evenly for 61/2 inches, then decrease 1 st every 2nd row, same side as increasings, until 2 sts remain. Cast off.

Sew all seams neatly and evenly. Sew border around neck. Place tie as illustrated. Press lightly.
-Originally published in Monarch Styles for Fall, 1935

Tuesday, April 21, 2009

Ecky Thump! Was Elsie Tanner a Knitwear Model?


The following photo is taken from an English Knitting Book circa 1945.
It illustrates a pattern for a beaded scarf.
Coronation Street fans and Tony Blair, I ask you...


Is this a photo of Pat Phoenix?
Ms Phoenix portrayed the glamorous Elsie Tanner for over 20 years. She wore a similar hat to this one when she married Alan Howard (when their characters were wed- I don't know about their offscreen do), and also to Emily and Ernest Bishop's wedding. Correct me if I'm wrong.


I would knit anything that might give me an ounce of Elsienish.

Tuesday, April 14, 2009

Knit For a Party


Knit for a Party

Diamond lace pattern and bead trimming for a charming little evening bolero-pretty look for informal parties

Materials: 7/8/8 (1oz) balls Patons Cameo Crepe, Patonised in Corn 5278.
Pair each Nos. 12 and 10 Milwards Disc needles. 4 Packets Knitting beads.
Measurements: To fit 33-34/35-36/37-38 inch bust; length from top of shouders, 19/19/19.5 inches (including band); sleeve seam, 6/6/6 inches (including band).

Tension: Pattern is based on a standard stocking-stitch tension of 7sts and 9 rows to an inch on No.10 needles.

Abbreviations: tbl=through back of loops; psso=pass slipped stitch over; wlfwd= wool forward.
Bead on next st=bring wool to front of work, push a bead up close to fron to work, slip 1purlways, wool back-the bead is now lying on top of the slipped stitch.

BACK
With No.10 needles, cast on 121/129/137 sts and work in lace diamond pattern as follows:-
1st row: *k2, k2tog, wlfwd, k1, wlfwd, k2tog tbl, k1; rep from * to last st, k1.
2nd and every alternate row: Purl.
3rd row:
*k1, k2tog, wlfwd, k3, wlfwd, k2tog tbl; rep from * to last st, k1.
5th row: k2tog, wlfwd, *k5, wlfwd, sl1, k2tog, psso, wofwd; rep from * to last 7 sts, k5, wlfwd, k2tog tbl.
7th row: *k1, wlfwd, k2tog tbl, k3, k2tog, wlfwd; rep from * to last st, k1.
9th row: *k2, wlfwd, k2tog tbl, k1, k2 tog, wlfwd, k1; rep from * to last st, k1/
11th row: *k3, wlfwd, sl1, k2 tog, psso, wlfwd, k2; rep from * to last st, k1.
12th row : purl. These 12 rows form pattern.
Work straight in pattern until work measures 10.5 inches ending with right side facing.
Continue in pattern, shaping armholes by casting off 8/8/9 sts at beg. of next 2 rows, then decrease 1 st at each end of next and every alternate row until 89/95/101 sts remain.
Work straight until work measures 18/18/18.5 inches, ending with right side facing.
Shape shoulders by casting off 9/9/10 sts at beg. of next 4 rows, then 8/10/10 sts at beg. of following 2 rows.
Cast off remaing 37/39/41 sts.

FRONTS
Right: With No.10 needles, cast on 65/65//73 sts and work in pattern as for back until front matches back at side edge, ending with wrong side facing,
Continue in pattern shaping armhole by casting off 8/8/9 sts at beg. of nexy row, then decrease 1 st at armhole edge on next and every alternate row until 49/48/55 sts remain.
work straight until front measures 15.25/15.5/16 inches, ending at front edge.
Shape neck by casting off 13/12/16 sts at beg. of next row, then decrease 1 st at neck edge on next and every alternate row until 26/28/30 sts remain.
Work straight until front matches back at armhole edge, ending at this edge.
Shape shoulder by casting off 9/9/10 sts at beg. of next and following alternate row.
Work 1 row. Cast off remaing 8/10/10 sts.
Left: Work to match right front reversing all shapings.

SLEEVES
With No.10 needles, cast on 81/81/81 sts and work in lace pattern as for back, shaping sides as follows:-
Increase 1 st at each end of 5th/5th/7th and every following 9th/9th/5th row until there are 91/91/97 sts, taking increased sts into pattern.
Work straight until sleeve seam measures 5 inches , ending with right side facing.
Keeping pattern correct, shape top by casting off 8/8/9 sts at beg. of next 2 rows, then decrease 1 st at each end of next and every alternate row until 59/57/61 sts remain.
Cast off 4 sts. at beg. of next 12/12/12 rows. Cast off remaing sts.
Beaded Border: Thread on beads as required. 4 beads are used over 12 rows.
With No.12 needles, cast on 7 sts, k2 rows.
Next row:(k1, bead on next st) 3 times, k1.
K. 5 rows.
Next row: k3, bead on next st, k3.
K. 3 rows.
These 12 rows form pattern.
Continue in pattern until enough has been worked to go all round cardigan, ending with 12th pattern row. Cast off.
Sleeve Bands: Work as for beaded border until enough has been worked to go round lower edge of sleeve, ending with 12th pattern row. Cast off.

TO MAKE UP
Press parts lightly on wrong side under a damp cloth. Join shouder, side and sleeve seams; insert sleeves.
Stitch border and sleeve bands in position, streching slightly on straight parts, and easing round corners. Join short ends. Press seams.
Originally published in Stitchcraft, 1968

Tuesday, April 07, 2009

Montreal Turban


Montreal Turban
Miss June Cox, Montreal, likes this pullover and turban in chamois yellow. She shows you two other intersting ways to drape the turban[sic].
Pins and clips and flowers, feathers or quills, make smart turban trimming!

Materials: 3 ozs crochet-knitting wool; 1 pr. #11 needles.
Tension: 8 sts, 11 rows =1 square inch.
This pattern requires a multiple of 4 sts plus 2. Twenty-four rows complete a pattern.
Cast on 50 sts.
Row 1 -K2 *P2, K2. Repeat from * to end of row (wrong side).
Row 2-P2 *K2, P2 Repeat from * to end of row
Row 3-Same as 1st row
Row 4-P2, *Knit the 2nd st on left hand needle, then, keeping this worked stitch on left hand needle, knit the first stitch in usual manner and slip both worked stitches off the left hand needle together. (The 2 sts worked in this way will, in future, be referred to as :KS”), P2. Repeat from *to end of row.
Row 5-K1 *P2, K2. Repeat from * until 1 st remains. P1.
Repeat last row twice.
Row 8-K1, *P2, Ks. Repeat from * until 1 st remains. P1
Repeat 2nd, 1st and 2nd rows.
Row 12-Ks, *P2, KS. Repeat from * to end of row.
Row 13-P1, *K2, P2. Repeat from *until 1 st remains. K1.
Repeat last row twice.
Row 16-P1, *KS, P@. Repeat from * until 1 st remains. K1
Repeat 2nd, 1st and 2nd rows.
Row 20-Same as 12th row.
Repeat 5th row 3 timews.
Row 24-Same as 8th row.
Repeat these 24 rows until strip measures 11/2 yards. Cast off.
TO MAKE UP
Block. Gather crosswise at centre. Fold strips at gathering and seam the 2 strips together along one edge for 8 inches to form crown.


Knitted turbans are seen with every sort of brillian clip or brooch this season, or you may tuck a flower, quill or feather into a fold after it’s draped into place. Our favorite is swathed in the regal coronet manner and stuck with those huge-headed Oriental-looking pins...massive earrings accompanying.

Saturday, March 28, 2009

Romantic Mood


Romantic Mood
Summer softness in the delicate lacy texture of a Princess blouse

Materials: Of Patons Princess, 9/10/11/12 (1/2-oz) balls Petite Pink 5722.
Pair No.9 Milwarmds Disc needles. Length of ribbon for collar and cuffs.

Measurements: To fit 33-34/35-36/37-38/39-40 inch bust: length from top of shoulders, 21.5/22/22.5/23 inches;sleeve seam, 15 inches, all sizes.

Tension: This pattern in based on a standard stocking-stitch tension of 7 sts and 9 rows to an inch on No.9 needles.

BACK AND FRONT ALIKE
Cast on 85/91/97/103sts and k1 row.
Work in pattern as follows:-
1st row: right side facing, K5*(k1 winding wool 3 times round needle)3 times, k3; rep. from * to last 2 sts, k2.
2nd row:k5*(k1 dropping extra loops off needle)3 times, k3; rep. from * to last 2 sts, k2.
3rd row-k2*(k1 winding wool 3 times round needle)3 times, k3; rep. from * ending last repeat, k2.
4th row: k2 *(l1 dropping extra loops off needle) 3 times, k3; rep. from * ending last repeat, k2. These 4 rows form pattern.
Continue straight in pattern until work measures 14 inches at centre, ending with a 2nd or 4th row of pattern.
With right side facing, shape armholes by casting off 15 sts at beg. of next 2 rows.
Continue straight until work measures 19.5/20/20/5/21 inches at centre, ending with 2nd or 4th pattern row.
Here shape neck:-Next row: pattern 13/16/16/19. cast off 29/29/35/35, pattern to end.
Continue on last 13/16/16/19sts. until work measures 21.5/22/22.5/.23 inches. Cast off.
With wrong side facing, rejoin wool to remaing sts and work to correspond with first side.


SLEEVES
Cast on 61/67/73/79 sts and k1 row.
Work straight in pattern as for main part until sleeve measures 15 inches at centre. Place a marker at each end of last row.
Work straight until sleeve seam measures 3 inches from markers, ending with 2nd or 4th pattern row.
Cast off loosely using a larger needle.

COLLAR
Cast on 127/127/139/139 sts, and k1 row.
Work 8 rows in pattern. Cast off.

TO MAKE UP
Do not press.
Join shoulder seams. Insert sleeves, sewing the 3 inches above markers to the 15 cast off sts of main parts, then sew straight edge round armhole edge, easing as required.
Join side and sleeve seams. Join collar into a ring and sew cast off edge to neck, with seam at centre back.
Press seams very lightly.
Thread ribbon through 1st pattern row of collar and sleeves, as shown in photograph.

Soft gathering with narrow velvet ribbon adds the Victorian look to this very pretty blouse-ideal for warm summer days.
The gentle easy-fitting style makes a very feminine design in the fashionable romantic trend.
Originally Published in Stitchcraft 1968

Friday, March 20, 2009

Roman Holiday


Roman Holiday Neckercheif
©Morgan Forrester, 2009

Materials:
Paton's Grace
1 ball Red
1 ball White

3.25mm crochet hook

Darning needle or small crochet hook for weaving in tails.

Please Note: This Pattern uses North American crochet terminology.

Gauge:
6 stitches and 5 rows = 1 inch over Single Crochet ground.


Colour Pattern:
Work 2 rows Red, 2 rows White
Repeat 2 row stripe throughout.

Striping Technique:
Change Colours in last stitch of each row.
Work sc as follows: insert hook into stitch, wrap with live colour and pull through (2 loops on hook). Yarn over with new colour and pull through both loops. Ch 1 with new colour working around old colour, trapping it vertically.


Decrease:

sc next 2 sts tog: About.com has a good tutorial.


Pattern:

With Red
ch 3


Working into both loops,
3sc in 2nd stitch from hook


*ch1, turn
sc in each stitch to last sc, 2 sc*
Repeat from *to* for 10 complete stripes
First Triangle Point completed.

ch1, turn
With Red, sc in each stitch to last sc, 2sc in last stitch (23 stitches across)
ch 1, turn
Working into back loop only:
%
sc 11
**With next colour
ch 1, turn
sc 5**
Work **to** for 5 complete stripes, ending with White.
Cut yarn, and thread through loop, leaving nice long tails for weaving in.


Turn Work.
Reattach yarn at far corner of triangle with Red.
Repeat from %
Finish last white yarn in the same manner.
Keyhole completed.

Choose most attractive side to be new RS
With Red, reattach yarn and ch 1
5sc, ch 1, 5 sc
ch 1, turn
sc in each sc and middle ch 1 (be sure to get under 2 threads in this stitch to make it secure)
Resume striping sequence, working in back loops only.
Work until piece measures 20" from beg.point ending with a White stripe (fudge if necessary)


Middle Section completed.


Working into both loops for Second Triangle:
With Red, sc in each sc across, ch 6
sc in 2nd ch from hook, and each ch and sc across (work under 2 loops of each ch) ch 5
With white, ch 1 turn
sc in 2nd ch from hook, and each ch and sc across (work under 2 loops of each ch)
***With next colour
ch 1 turn
sc in each sc to last 2 sts, decrease***
Repeat ***to*** until 1ish stitch remains.
Cut yarn and thread through loop. (We are about to clean this up some.)


Edging:
Beginning at middle of work, sl st in each st across. Work a ch 1 at corners. Use this step to clean up or disguise any messy joins and wraps.

Block and pin stiffly.

Inspiration:
I love knitted bowtie/keyhole scarves.
Here I've channelled some 50s flair to create a crocheted version.
Crisper, angular and more graphic than it's knitted counterpart, I think this neckerchief reflects the key differences between the two crafts.
I explored what the limited crochet rib can do for a person, and let sc's stiffness, rather than knitting's elasticity lock the bow in place.


Sunday, March 15, 2009

Beret Update


This Pattern is now found at The Loop's Download Page
Please update bookmarks.
Don't let it languish in your queue!
I was really getting into the swing of hats and now, today, just now, the weather has changed.
Berets aren't affected by seasonal weather though. Or they shouldn't be.

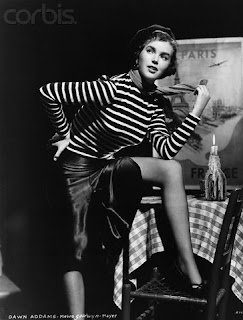
Faye Dunaway as Bonnie Parker, 1967

Friday, February 27, 2009

Lady Parker Beret

This pattern was designed for The Loop and directions can be found on their Free Pattern Page, as a pdf file. Post your projects on Ravelry and see other crocheters' results.


Alright, alright, you already have a slouchy hat this winter. Let me tell you what I like about this one.

It uses alpaca. The droopy slouchy factor is built in!

It has enough looseness to look haphazard,but not enough so as to look like you borrowed it from someone bigger headed.

Single crochet around the brim ensures a firm tight crown at the business end so that the textured fabric can do what it likes without falling off your head. Sometimes, in an attempt at volume, these hats contract too quickly creating a mushroom cloud hat or they overcompensate by ending in a very tight edge. Here, the brim is worked first.

It's crocheted, it's textured, and yet it takes 1 skein! (just)


As to inspiration;

Berets......

Mary Nolan


Clara Bow


...and Parkers

Bonnie Parker


psst...If you know how else to make 4'11 look tough, let me know.


Lady Amy Parker (who clearly would have gone for a fashionable chapeau like mine)

Sunday, February 08, 2009

Liquid Lace Jacket


I made this a looong time ago. Maybe last summer. I know I added the Pineapple Edging at Pacafiesta. In theory it was an easy knit. A lace Jacket comprised of three Danish doilies (1 large for the back, 2 small for the sleeves. The sleeves were of a second pattern) crocheted together in a lattice worked between the crochet chain trim of the doilies. The vintage edging was added around the east, west, and north sides of the large circle, as well as the northernmost parts of the sleeve circles. This way a pineapple peak was placed at 12 o'clock on each doily circle.


Any further questions about construction, leave a comment and prepare for sketchy wordy explanations.


Unfortunatly for us, the edging puckers and bends the back of the jacket so it doesn't look particularly nice on a hanger. On the other hand, it's great to wear while puttering round the store and rearranging the store window ala Mary Portas, we hope.

Fiddlesticks Zephyr in Teal
3.5mm 24"circular and dpns to match
1.25mm crochet hook
3 Doilies -modified from the Danish, "Ingela" and "Lille Flacon"
Seamed with crochet and Applied Crochet Edge-vintage pineapple bedding edging.


Inspiration:
turning circles into squares
"t" shapes
"her gown was no more than the water could cover" S.N.
Related Posts Plugin for WordPress, Blogger...