Showing posts with label Quest For Puff. Show all posts

Saturday, January 28, 2012

Choosing & Placing Knitted Shoulder Pads

Here are some examples of effects created by Gauge Swatch Shoulder Pads. These pads are generously stuffed; remember that the thickness or fullness of the pad is up to you. The pad shapes shown here are Square,
Triangular,
and Rectangular.
Read about how to make your own shoulder padding from gauge squares here. It is worth noting that the effect of the Rectangular pad is similar to that achieved with Sleeve Head Rolls.

1.

A Square pad tacked to both the shoulder seam and the inside of the sleeve head, rounding the shoulder line and supporting the apex of the puff.

2.

A Square pad placed halfway down the neck (at about the bra strap) so that half of the pad projects beyond the natural shoulder.The pad is sewn along one side, crossing the shoulder seam, with the inner corners tacked to the front and back of the garment. The free edge of the pad is weighed down by the sleeve, taking the shape of the puff. The seam of the pad, because it is located further down the neck avoids added height but still has a military feel.

3.

A Triangular Shoulder Pad with the fold (the longest side) attached to the shoulder near the centre top of the shoulder seam. The point of the triangle is left free floating to take the shape of the puff. With an overstuffed pad such as this one, a kick-up shoulder line can be achieved.

4.
(My favorite!) A Triangular Pad with the centre point attached to the shoulder. The folded side projects into the head of the sleeve, and dictates the end of the shoulder line.
The sleeve follows the shape of the top of the pad and then falls in a clean vertical drop. This is a good way to give structure to a drapey or lacy knit.
5.A Rectangular Pad attached to the shoulder at the centre of the pad's long seam.  Small stitches tack those inner corners to the front and the back of the garment.
The folded edge of the pad extends the shoulder line and supports the fullest part of the puff sleeve.The outer edge of the shoulder becomes rounded.
6.
 A Rectangular pad attached to the shoulder at the sleeve seam with the long seamed edge pointing up into the puff.  The fullness of the sleeve is kept aloft by the pad's seam.  This is suited to a twin set because of the seaming difficulties.  The determined could tack the lower corners to a bra strap or a under shirt to prop up a knitted jacket.
The outer edge of the shoulder line is supported for a softer war time look.


A Final Note:
Use a seamless join like mattress stitch or grafting at the top shoulder seam in preparation for this type of padding.
 Use a 3 needle bind off if you plan on using modern, store bought shoulder pads; the ridge created by the seam will provide a spine useful for stitching the centre of pads to the sweater.
You are reading "The Quest For Puff" ©Morgan Forrester

Up next:
Padding Vintage Sweaters with Sleeve Heads
Coming Soon:
Vintage Sleeves: Puff Pleating
Vintage Sleeves: Seaming for Puff
Creating Puffed Sleeves Anew

Tuesday, January 17, 2012

Vintage Pattern Photos with Shoulder Pads

Here are some examples of Vintage Pattern Photos that put Shoulder Pads to good use: vintage sweater sleeves
This shape can be supported by a kick-up pad.  If you cannot find this style of shoulder pad consider using shaped sleeve heads or a rolled pad.
vintage knitting tutorial padding
In this pattern photo you can clearly see the edge of the shoulder pad.  It appears to be shaped like modern women's wear 'coat pads'.  It features a steep increase from the inner to outer edge, and lets the sleeve hang straight down below the modest puff.
vintage sweater tutorial on sleeves
A roll or long rectangular pad (see gauge swatch pads) should be used when the sleeve seam sits this far from the neck and the puff extends the shoulder line.
how to pad vintage sweater
The line of this 1950s shoulder is improved by a round pad.  Although the welt features drastic shaping (presumably full fashioned increases) the sleeve and shoulder are very basic.  The pad creates the shape and adds drape to the heavy fabric.  This is the kind of 'figure enhansing' padding that Dior re-introduced.

knit shoulder pads
Another kick-up shape.  Any kick-up shoulder pad, whether it is a pad or layered, angled sleeve head, needs to be customized and carefully placed.  In this case most of the shaping comes from the fabric type and pleating.  The padding supports, rather than creates the shape.
vintage knitting shoulder pads
To support the apex of this folded puff sleeve, a triangular pad or a modern shoulder pad. trimmed to shape should work.  When the shoulder line is extended to this extreme, consider stitching the pad so that the greater portion of padding is free of the shoulder.  Try flipping a triangular pad so that the point sits at the centre of the sleeve to shoulder seam, and that the long side sits at the edge of the shoulder.
wartime knitting sleeves
Without some sort of pad a cardigan or any kind of second layer would flatten a delicately puffed sleeve jumper.  In this example the pad would most likely have been knit as a small rectangular (almost square) pillow, stuffed with fleece or maybe sawdust.  A clever home knitter might have used her gauge squares!
1940s knitting
Remember that a sturdier knit may not require a shoulder pad.  Often, a dense or thick fabric can support it's own puffed up weight, so long as it has been properly gathered or pleated before seaming into the armseye.
1940 shoulder pads in sweater
This pattern photo clearly shows the outline of a shoulder pad.  It is shaped much like todays shaped pads and is a handy reference for padding placement.  It will have been stitched down the centre spine, with small tacking stitches taken at the two side points of the pad, securing it to the front and the back of the sweater.

'For When You're Off Duty ' is an uncommonly accommodating pattern.  The pattern includes direction of a custom shoulder pad.  Despite the dense fabric created by pleating the firm 1x1 ribbing of the sleeve, this elongated shoulder line would not stay aloft without it's padding.

You are reading "The Quest For Puff" ©Morgan Forrester

Up next:
Choosing & Placing Knitted Shoulder Pads
Coming Soon:
Vintage Sleeves: Puff Pleating
Vintage Sleeves: Seaming for Puff
Creating Puffed Sleeves Anew


This post is a part of The Quest For Puff Series. Read it from the beginning HERE.

Monday, January 16, 2012

Shoulder Pads & Puff Sleeved Sweaters

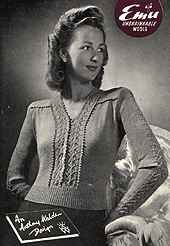
vintage knitting puff sleeves
There's no need to sit like that; a good shoulder pad will keep your puff in place!

There is a lot to cover. First off, I ask that you shove all your preconceptions, jokes, eyeball rolls and Dynasty memories to the back of your mind. We are talking about a different era for starters.
Shoulder pads in the 30s/40s were a very different beast. They were not the Velcro disks that we immediately think of in a post 1980s world.

Shoulder padding falls into 3 main categories (at least for our purposes)
Pads
Sleeve Heads (Shaped and Rolled)
Supports
This is of no help to the home knitter.

Elsa Schiaparelli, perhaps best known to us knitters for her iconic tromp l'oile sweaters, pioneered an unbelievable list of fashion classics, among them the Shoulder Pad. The Schiaparelli shoulder is strongly associated with Hollywood glamour, and all the broadest of faux-broad broads, Crawford, Garbo and Hepburn were fans.  Her look is satirized and honoured in the fashion show segment of The Women (fashions by Adrian) Watch the clip below to see how these extreme silhouettes and shoulder styling are era specific. These pads were often triangles; soft cushions extending width. Her 1930s mainstreaming of adjustable shoulder padding into conventional women's wear ensured that the square shoulder of the 1940s was feminine, rather than a simple diminution of military uniforms and other customs of mens tailoring.


You must click HERE to watch on youtube proper.
Watch on Mute!  This is (clearly) not the original soundtrack.


Shoulder Pads are best suited to structural puff sleeves.  Puffed, or full sleeves that have been folded or pleated into the seam benefit most from this style of padding.  Military, kick-up, and elongated shoulder lines from the late 1930s up until the introduction of the New Look in 1947 were supported by shoulder pads and should be now.  The hand knitter working from patterns in this era would have taken this extra step for granted.

Know which look you're going for by reading Puffed Sleeves in the 1930's and 1940's.

Many Vintage Patterns include directions for knitted pads to be sewn to the inside of the sweater. A good example may be found in the V&A's collection: "For When You're off Duty". This little pad is more like a cushion; knit of jumper yarn (sock yarn is a good substitution) and stuffed to your taste. It rests on the shoulder and supports the apex of the puff. Make your own as you would a cell phone cozy. Two squares or rectangles sewn together, or one folded in half and seamed will do. For a softer, pre-war look, you may choose to make your pad out of two triangles rather than rectangles which have a more masculine feel.

Read 'Using Gauge Swatches as Shoulder Pads in the Vintage Style' for more on knitted padding.
Read 'Choosing & Placing Knitted Shoulder Pads' for further guidance.

Today, ready made shoulder pads may be purchased at most fabric stores. These objects are more like the power suit boosters we are used to. For Knitters' use they will most likely need to be trimmed. For this reason I do not recommend buying vinyl pads. Good companies provide different pads for different sleeve shapes i.e. Raglan, Dolman. The pad is sewn to the garment through the center, creating a spine for the pad. Baste this spine and try on the sweater. Working from the outside, still wearing the sweater, take small stitches with the sweater's yarn (de-plyed if necessary) to anchor the pad in place, or for heavy yarns, sewing thread.
For an extreme vintage look I recommend a "coat pad" (a pad used in coats) with a 1" thickness. For a blouse vs. a sweater a 1/2" thickness may be more appropriate.
The looks which large pads can provide depend entirely on their placement, so a great deal of experimenting will be needed.  It is best to do this while wearing the garment, whenever possible.  If trimming is necessary, use a fabric marker to note cuts while holding the pad on your shoulder (with a friend or a mirror).


This vinyl pad is not what we want.  Note the centre stitching along the pad, attaching it to the shoulder seam.  We do want this.

Ready to wear Shoulder Pads tend to come in white, nude or black. If none are available in an appropriate shade for your project they may be covered. For a nude look try using old nylons to cover a pad.
For an outrageous shoulder la Joan Crawford or House of Balmain, consider layering 2 or more pads. Baste them together through the centre spine, and then cover the pad using loose stitches or feather stitches and cover with fabric or nylons. This is a great technique to use if you can only find 1980s styled flat pads.
American football comments be damned!

Generally these kinds of paddings can be made at home with little sewing experience.  With a reliable sewing store in your area though, you may find it easier to purchase ready-made padding, and then alter it at home.  Pads may be opened up at the seam and the amount of wadding can be adjusted.  You may choose to add or remove bulk, or you may decide to push the stuffing to one side or the other, depending on your sweater style or body type.  If you are layering sleeve heads or pads use large feather stitches.  If you are layering fibrous padding stuffs, experiment with spray adhesives.  If a large shoulder pad's slope is to wide for your shoulder or if you have a petite shoulder line, cut your pad in half.  Trim as necessary, adjust the angle on your own shoulder, and then reattach the front and back of the pad using a baseball stitch.  Remember that few bodies are symmetrical, so treat each pad, each knitted piece, and each shoulder separately.

Click HERE to see examples of Vintage Sweater Pattern Photos that put Shoulder Pads to good use.

You are reading "The Quest For Puff" ©Morgan Forrester

Up next:
Choosing & Placing Knitted Shoulder Pads
Coming Soon:
Vintage Sleeves: Puff Pleating
Vintage Sleeves: Seaming for Puff
Creating Puffed Sleeves Anew


This post is a part of The Quest For Puff Series. Read it from the beginning HERE.

Sunday, January 01, 2012

Shoulder Pad Intro


Peggy Cummings in 1950's Gun Crazy
Shoulder Pads: You Don't Gotta Love Em. I do. It's a compulsion. I love their various forms, their little ways and quirks. I love that shoulder pads can be used in more than one way, regardless of their shape, and that subtle shifts in their placement can result in very, very different fits and effects. For these posts we'll assume that we're going for a full-on vintage look from the 1930s, 1940s or '50s. That said, we can do things authentically (the way these jumpers would have been made and worn in real life) or we can mimic the ideal modeled in the pattern (or an ironic exaggeration of the look). It's easy to switch between the two goals.

It is also important to note that the way we remember things isn't always the way they really were, especially if like me, you have no business remembering 1930. The way we romanticize an era gradually changes the way it is remembered, and soon a few singular looks or trends come to represent a period. We cannot help but bunch these into decades, and in time the handful of looks and ideas which we now associate with periods like the 1960s or 1970s will be whittled down to one image as it has been in preceding decades. Look back beyond the turn of the 20th century and the average person will have one outfit which they associate with each century. What on earth will come to represent our current time? Well this is a completely different topic now...

I guess I was trying to point out that the look a knitter is looking for within the patterns of a period may not even exist within those years. It may only have existed in the Hollywood send-ups of period films and costume dramas, or the time-machine fantasies of fashionistas. That does not mean, however, that the look can't be achieved. This is another reason to experiment with padding. A cleverly chosen shoulder pad, well appointed, can change an everyday and historically accurate sweater pattern into the imagined silhouette of any fashion fantasist.
A variety of garment shoulder pads available at diytrade.com
A shoulder pad is not an accessory for a jacket or sweater; it is part of the internal structure of a well constructed garment.
Also, pads are not the whole padding story.  There are many ways in which the home knitter can support a full or puffed shoulder.  Shoulder pads are just the most familiar tool in a post-1980s tool box.  A vintage-enthused knitter should acquaint herself with all forms of padding before completing her puffed look.
Learn about your shoulder pad-ding options here.

You are reading "The Quest For Puff" ©Morgan Forrester

Up next:
Coming Soon:
Vintage Sleeves: Puff Pleating
Vintage Sleeves: Seaming for Puff
Creating Puffed Sleeves Anew


This post is a part of The Quest For Puff Series. Read it from the beginning HERE.

Wednesday, November 09, 2011

Puffed Sleeves In The 1940s


Truly, fashion at the beginning of 1940 and at the end of 1949 should not be lumped together.  The attitudes and influences in the years immediately following the Second World War make for a very specific period of 20th century fashion, as does the introduction of Dior's new look.  For knitters though, a lumping together of years might be more forgivable.  After all, we are dealing less with high fashion, or even commercial fashion; just its trickle-down influence.  Also, because home knitters have to source their own materials, the continuation of rationing post war, and material shortages for the years to come affected home knitting fashion directly.

I'm Canadian, so most of the vintage patterns I find are British, Canadian, or British patterns reformated for Canadian import. This means that the terms I use for vintage patterns are usually British (ie yarn weights, needle sizes) and that all of my patterns from the 1940s are influenced by the Second World War and by the rationing that followed.
At no other time in modern history was knitting so newsworthy!
The War Knitting Marathon at the 1940 New York World's Fair

Several initiatives were already in place when war was declared and the British and Canadian Governments created and regulated many wooly efforts. These have been well documented, especially in the last few years. Try these posts to learn more about war time knitting. Of course these knitting initiatives served those knitting for the troops and wounded overseas, but also served the garment needs of the homefront. 'Make Do And Mend' is only one part of the 1940s knitting story. It is also only one influence on the creative home knitter of this period. Perhaps another post is needed. If and when I write it, it will be slotted in with a link here.
The conditions of WWII knitting made a pleated puff sleeve possible and popular.

Where the pads of the 1930s had extended the shoulder line slightly into the cap or puff of the sleeve, supporting the height of the puff, the puff sleeve of the early 1940s was often constructed and fitted flat at the top of the cap and, because of it's rigidity, and the shape and firmness of the shoulder pad, sat level with the shoulder, puffing every direction but up.
A 1940s puff; the flat, pleated top of the sleeve extends the shoulder line.  
A pad (visible on the left shoulder) helps to push the puff out.  
The firm lace and long cuff exaggerates the fullness at the shoulder.

Moving forwards, the puff sleeve of the later war years was much more extreme.  The WWII shoulder attempted to do two things:  appear soft and feminine (round puff), and to echo the uniforms and wartime spirit of the time (squared shoulders).  These two looks (which sometimes appear together in some of the more fantastic wartime sweater patterns) are controlled by three factors: the construction of the sleeve, the setting of the sleeve, and the padding of the sleeve.  Day to day, it is the pad that becomes indispensable.  With a mini collection of different kinds of pads, a home knitter could (and can!) change the feel of a jumper depending on the event, mood, or time of day.
Yahoo!

Several factors also contributed to the practical possibility of these kinds of sleeves, and to the flourishing of puff.  Wartime sweaters were often knit with a yoke of a different scrap colour or stitch pattern, in part to save and use up scraps (remember that a British coupon was worth only 2oz of wool), but also because of the striking effect it creates.  A straight, no-nonsense line separates the two areas and sets off the whimsy of a slightly silly sleeve.  It also slims the shoulder no end; very dainty, but still efficient.  This visual effect was easy to achieve without too much experience and it is a great way to instantly evoke a vintage feel today.


A more experienced knitter might also knit the puffed section of the sleeve in the yoke colour or pattern, continuing the line of separation across the entire body.  Striking, and neat as a pin.  No one wanted to look frivolous or wasteful so few sweaters from this period were particularly lacy, or knit loosely or drapey, instead lace was close, creating a firmer fabric than typical knitted lace. A firm fabric is easier to fiddle with when it comes to setting the sleeve; a plus for a puff or sculpted sleeve.
Puffed and exaggerated shoulders were unavoidable; the fabric created by the body of wartime sweaters was one just begging to be inflated.

My 'Vantine's' Jumper has a yoke of a firm fabric to help with finishing.  Also note the firmness and pertness of the lace pattern.  It is delicate, but not drapey.

Sweaters needed to be more durable because for many, more time was having to be spent outdoors. This meant that padding and pleating could be added to greater effect. It also meant that the fabric of the sweater was sturdier, especially due to the scarcity of fine yarns. Many sweaters were knit of old, recycled sweaters or scrap yarn meaning that the wool was often stiffer than normal. Recycled yarn also looses it's elasticity and must be knit firmer.  Most sweaters of repurposed wool were knit in textured fabric, perfect for structural sleeves.  Although beautifully shown in 1940s patterns, at home stranded knitting was largely avoided over the top of the sleeve, and Fair Isle patterns were usually placed by novice knitters on the yoke alone.  Most sweaters were of one colour (on the sleeve) and of a textured stitch pattern so that in the finishing, the gathering or "easing in" of excess fabric at the head of the sleeve gave an instant structural look even if no special finishing techniques were used.  Make do and Mend, Red Cross depots, and Air Raids all meant that women were knitting in groups more than ever, and so specialty stitches and techniques could be shared (or not).  More home knitters and new knitters could now attempt puffed sleeves.
Granny, her mates in the WAFs, and their shoulders.
This look was in because of the unavoidable influence of military uniforms on fashion. Of course many women found themselves in uniform, but many women called to war work outside of the forces wanted to emulate this appearance of professionalism and patriotism.

In this way pads became as square as the squared shoulders (figuratively and literally)of the military, and padding raised them adding height in addition to width. With 'Make-Do" foremost in every knitter's mind, many pads were made of scrap fabric and were stuffed with yarn scraps or sawdust if cotton was scarce. These pads were adding height (new since the 1930s) and so were often knit or sewn square, rather like little beanbags.  Click here to read "Using Gauge Swatches as Shoulder Pads in the Vintage Style", part of the Quest for Puff series!

This free pattern from the Victoria & Albert Museum's War Time Collection features a custom knitted shoulder pad. 

The Shiap tried to kill the square look, introducing a sloped shoulder. It did not take off. Operating out of the States, rather than Occupied France, she was fighting the fashion houses' rebellion. The Couturiers showed manish shapes, awkward hems, ugly shoes and misappropriated hats, all destined (they hoped) for the wives of German officers; no one else could afford them. England stayed ignorant of this trend until well after the war; their shoulders would never become as bizarre.
Occupied France's lines had only a slight influence on British styles.

A peasant revival was inspired by land girls, though most land girls themselves could not participate in it.
Girlish puffed sleeves couldn't help but be popular, (a look carried over from the '30s) and stayed inflated and round until around the time the Americans joined the war. After Pearl Harbour the military inspired square shoulder won out for the most part, and puffs tended to be angled until Dior's New Look. This is partly to do with the fact that the fashion colonies were cut off from France. Forced to look elsewhere for mode, foreign designers pulled from the military look, and even the specific uniforms of local heros. It is at this point that the American and British commercial fashions really begin to take on a unique cultural identity.
The Peasant/Folk craze would continue to come and go as it had for centuries.  
For the home knitter it would become a haven of puff.

Dior launched his 'New Look' in 1947.  Of course it changed everything and part of it's success was it's very 'newness'.  It was achieved, however, by reviving some very old techniques.
You might think that the Look's rounded shoulder lines would kill our story and certainly annex the shoulder pad.  Although a square shoulder was instantaneously out of date, Dior's rebirthing of French Tailoring and Couture techniques, many unseen since Victoria,  made padding a staple.  Pads became more shaped, more like the ubiquitous pads of the 1980s.  Sleeve Heads, particularly for jackets were to become, and remain essential.
Pads can be used to give puff shape to a shoulder that was knit to be sloped.  
This look is a bridge between the square and the round shoulder.

Dior's line was universally lauded and in Britain it was seen as a breath of fresh air.  The American and British Governments however, were furious.  They were working very hard to ration a public who was confused about restrictions still in place after the war.  Dior's New Look, with it's ample fabric was very very expensive and hard to come by.  Nowadays, this would be a case for High Street knockoffs.  Britain, however was still rationing many garments and dressmaking materials, and would continue to do so for several years.  Also,  mills and design firms had both been restricted and could only produce a limited line of products.  Knitting was still essential, and now more of the home knitter's time could be spent on personal projects, rather than knitting for the troops.  The Red Cross in Canada and the US continued to collect for various worthy causes, but here too we see more involved patterns for the knitter herself.
Knitters continued to employ tricks like this one to conserve rationed wool; the contrast colour is embroidered over the body of the sweater, extending it's effect.  Perhaps the wool for the embroidery was salvaged from the pocket of another sweater.  The firm fabric of the sleeve (since the colour wasn't stranded) is perfect for pleating into a puff.

In February of 1949, wool clothing ceased to be rationed.  This meant that if the consumer could afford it, some items could be bought and no longer needed to be knitted.  Unfortunately, this didn't quite produce a renaissance of personal knitting as it had after WWI; knitting wool would remain rationed until 1952.

When it becomes readily available again, yarn will be a very different product and knitting will have to adapt.

Bring on the 1950s '60s and '70s.

You are reading "The Quest For Puff" ©Morgan Forrester

Up next:
Mid Century Peasant Puff
Coming Soon:
Vintage Sleeves: Puff Pleating
Vintage Sleeves: Seaming for Puff
Creating Puffed Sleeves Anew


This post is a part of The Quest For Puff Series. Read it from the beginning HERE.
PS  Sorry, I don't know what's up with the spacing.

Saturday, October 08, 2011

Using Gauge Swatches as Shoulder Pads in the Vintage Style


Even before rationing made reusing and recycling wool necessary, clever knitters were repurposing their gauge swatches (tension squares) as shoulder pads. A swatch can be made into several different styles of pad. We'll be looking at three: triangular, square, and rectangular.


NOTE: The average swatch is knit to 10cm (4"). The examples in this tutorial are each of 24 stitches; a neat display device I tried at The Loop. These swatches were of various worsted weight yarns resulting in 18-22 stitches per 4 inches. The average size of swatch was 5" square.
Because they were for display purposes, each swatch was knit with a garter stitch border 3 stitches on either side and 3-4 rows top and bottom. This is an excellent format for a swatch destined to become padding. The garter border allows for easy stitching and stuffing, and also creates an ideal flat surface for placement and stitching to the garment, particularly useful if the pad is to be removed or used in multiple applications. These worsted weight swatches make a big statement but for a more subtle look, use a fine yarn. The point of this technique is that you will have already made the pads by swatching for your project, and since most of your vintage sweaters will have been knit with a fingering or sport weight yarn your pads will be less cartoony than my examples.


Triangles/1930s
As we know, shoulder pads first became necessary to the home knitter in the 1930s so that the shoulder line could be extended gracefully, and girlish puff sleeves could stay aloft. The first shoulder pads were triangular, a perfect job for the typically square gauge swatch.

Your swatch is unlikely to be a perfect square, but this does not matter much. Fold the swatch in half and pin one side as you begin work on the other. Any waste yarn will work for this project; it need not be the same yarn as the gauge swatch. Using the garter stitch border as a guide, stitch generously. Tiny stitches are nice, but not necessary. Do not seam these two edges as you normally would a knitting project. Grafting or Mattress Stitch will ruin the affect. Backstitches, or even a Running Stitch, if you're inpatient will do the job.
Place these stitches in from the edge. The stitches in the photo were placed in the middle stitch of the 3row/3 stitch Garter border. This works to about .25" from the edge. If your swatch does not have a border like the example pad does, place your seam .5" in from the edge. This will create a ridge you can use to attach the pad to the garment.


Stop stitching your pad together an inch or so before the second corner. Use this opening to stuff your pad. Do not cut your working yarn or unthread your needle.
You have several stuffing options. I stuffed the examples above with raw fleece, but only because it was the easiest thing to hand. Polyfilla, cotton baton and fluff will do just as well. Followers of Make do and Mend may take a tip from WWII and fill their pads with scraps of waste yarn....or even sawdust.

Note: If you are using flat sheets of wadding you should cut these to the shape of your swatches, leaving a .5" seaming allowance along the sides to be stitched. In the case of a triangular pad this means that along the third side the wadding should reach the fold of the swatch. In a square pad you will need to leave a seam allowance along all four sides. You will layer the filler to taste, depending on the thickness of the wadding, but start with just one layer.

Whichever material you choose, resist the urge to overstuff.
Pick your needle back up and finish stitching, closing the stuffing gap, and backstitch to secure. To finish, bury your yarn by inserting the needle into the pad and stuffing and bringing up through the middle of the pad's fabric as pictured further down. Now clip the yarn close to the surface.

Squares/1940s
Square shoulder pads are made in much the same way and will thrill knitters of 1940s patterns. In the sweater patterns of the 40s we see instructions for shoulder pads start to crop up and although some of them are unique to a single sweater, most are simple bean bags of the same yarn as the main pattern. Remember that under WWII's military influence pads were required to both extend the shoulder line, and raise it. In more extreme puffed sleeves, the sleeve head would be totally unsupported but for padding. This is one reason for disappointing, deflated puffs in home knitting.


In this example the two swatches are of slightly different sizes. This is almost always likely to be the case, and it doesn't really matter for this project. Simply pin the two squares together so that the edges match. The centre of one of the swatches will bulge, but that's what we want anyways.


Don't overstuff the square pad either. The amount of filler in the photo above was a good starting point; you may find that you need less padding than you thought. Remember that placement of the pad is going to be very important. Extreme vintage looks are created when the shoulder pad is stitched in. Overstuffing will actually give you less options and control.


A sticky material like raw fleece will tend to ball up in the middle. We want an even stuffing so use your fingers to distribute the filler evenly.

Bury your yarn as pictured.


A single square can also be made into a rectangular pad by folding a swatch in half and stitching. In my knitting I find this to be the most useful pad. The truth is, it has a bit more in common with another type of padding; a 'sleeve head' or 'roll'. This is because its short sides will follow the curve of the shoulder and support the front and back of a round puff. The term sleeve head is problematic! Read more about this in the intro to this padding series:here.

The rectangular gauge swatch can afford to be stuffed generously. The most important aspect to this pad for knitters, is the top seam. If your swatch does not have a garter stitch ridge remember to place your stitching well away from the edge. Along the long sides of the rectangle sew at least .5" in, creating a flat strip. This is what you will use to attach the pad to the garment.


Next we'll talk about the placement of these pads and the different looks they can achieve.

This post is a part of The Quest For Puff Series. Read it from the beginning HERE.
Related Posts Plugin for WordPress, Blogger...